February 22, 2020

Assembling a PC (Part-3) -Tech master.

by , in

Assembling a PC (Part-3) -Tech master.

In last post we have discussed some main parts of Assembling a PC, and what are they posted pictures to help you what they look like.
In last post we have discussed about:-
  • Installing the CPU or processor
  • Installing heat sink on processor
  • Installing RAM on the mother board
  • Placing mother board inside the cabinet
Before starting, I would like to tell you guys if you came here for learning on how to Assemble a PC in simple and easy steps. Then guys first you should read my Last 2 posts in which i have discussed main steps on assembling a PC. If you will go through you will better understand the scenario, and i have wrote in very simple way, so that it will be easy for anyone to understand, posted pictures wherever needed. To go through my last posts just click on the link given below:-

So, In this post I am going to tell about this topics listed below:-
  • Installing Expansion cards
  • Installing HDD and ODD
  • Connecting Interface and Power cables
  • Closing the cabinet

Installing Expansion cards

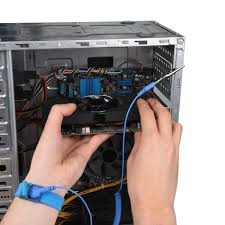
Now after the mother board has been placed in the cabinet, the next step would be to install few Expansion cards such as graphic card.
To install expansion cards in a PC refer to the following steps:-

Depending on the form factor of the PCI Express card, Locate the appropriate slot for the same on the mother board.

Once, you have decided on the slot you are going to use, remove the blank against the slot, which is a thin piece of metal attached by either a screw or clip which covers the hole in the chassis.

Take your card holding it by the edges and line it up with the slot with the help of the alignment notch.

Pull-back the clip (C) to lock the card in place.

Ensure that the card is correctly and firmly inserted. Then insert the holding screw into the cards face plate to the mother board chassis and tighten the screw down firmly.

Installing HDD and ODD

HARD DISK DRIVE

OPTICAL DISK DRIVE

Now, we need to mount the Hard disk drive (HDD) followed by the Optical Disk Drive (ODD).

Installing a Hard drive is one of the simplest procedures in Assembling a PC. 
An internal 3.5-inch hard disk drive is typically mounted in a drive cage or in an available drive bay.

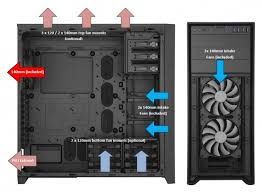
Placement and orientation of the cages or bays will vary from case to case and that the most common location is at the lower front, near the intake fans and away from other components.

Drive cages/bays will most often be mounted perpendicular to the bottom of the chassis.

Here are the steps to install Hard disk on the computer.
Find an appropriate location for the drive. 
The drive must be kept cool. Try to leave as much space between drives and other components as possible to maximise airflow over the tops and bottoms of the drive. Positioning the drives directly in front of an intake fan also helps.

Secure the drive to the cage by using screws, If the cabinet has a tool-less tray or bracket that holds the drives with simple pins and clips, this step may not be required.

Installing Optical drive

After installing the hard-drive in the cabinet, let us install the optical drive using the following steps:-

Locate the position of the optical drive in the case. Since the optical drive is accessed by the user through the case, you may need to remove the plastic blanking plate that may be fitted in the cabinet to hide the drive bay meant for the optical drive. The blanks have plastic clips on either side that hold them in place. You may use a flat-head screwdriver on the edges of the blank to gently ease it out one side at a time.

Line up the drive with the opening of the drive bay and gently slide it into position.
Push the drive all the way inside the drive bay until the front of the drive is in the line with the computer case.

Once the drive is in position, insert all screws one by one and lightly tighten them. 
Once all screws are in place, fully tighten the screws.

If the cabinet has a tool-less tray or bracket that holds the drives with simple pins and clips, this step may not be required.

Connecting Interface and Power cables


After all the electronic components are in place, start connecting all the power cables. SMPS has a variety of connectors that include CPU 4+4 pin, Mother board 20+4 pin, SATA cable, Floppy 4 pin, PCI -e 6 pin, PCI -e 6+2 pin and peripheral (MOLEX) 4 pin.


Identify each connector and connects it to power the appropriate components of the mother board.

Connect the 20+4 pin connector to the mother board.
To better understand see the above picture carefully.

If your mother board requires a secondary 4-pin or 8-pin connector, which most of the modern motherboards do, connect it to the motherboard just like the previous 24-pin connector.

The CPU fan receives power from the motherboard. Connect the CPU fan connector to 3-pin or 4-pin male connector provided on motherboard.
                                         
The next step is to supply power to the hard drive. Use a SATA power cable to connect the drives to the motherboard.

Next, to supply power to the optical disk drive, you may use SATA or IDE cable, depending on the type of the optical drive.

Connect the SATA interface cable to both HDD and ODD.

To supply power to the PCI Express expansion cards, you can use 6-pin or 6+2 pin connector, depending on the requirement.

Connect the case fan to the motherboard for power.

Finally, you install cabinet connectors. Every cabinet has various buttons like power button, Reset button, Power LED, Hard drive LED and accessory ports like front USB option and Front sound ports. Simple wire-cables are used to connect these to the motherboard based on printing/labelling on mother board.

Now the last step is closing the cabinet.

Closing the cabinet

After connecting all the cables the following steps needs to be carried out to close the cabinet.

Ensure that all wires are put in and there are no hanging wires.

Confirm that no tools, such as screw driver or screws are left inside the cabinet.

Attach the cabinet cover and secure it with screws.

Connect a Power cable to SMPS of the computer.

Connect the other end of the power cable to the outlet or an Un-interrupted power supply (UPS) to ensure that the computer is not damaged due to voltage fluctuations in the main power supply.

After this steps are completed, you are more than half way done.
After following the steps discussed in these 3-parts, you will easily be able to assemble a PC.

So i will recommend you guys to please visit and read those articles as well.

As i said i will divide this posts in 4 parts, so i have completed 3 till  now. All of these posts on Assembling a PC are important in their own perspective, you can not Assemble a PC if you leave even one of them, so please go through once.

One thing i need to tell is if you really like my post and found it informative and learnt something new which you didnt knew, or with help of my post you were able to Assemble a PC then, please share this post. Hope with your one share someones problem may be solved.

If you guys want more of these posts, please share and do comment below to improve me helping you guys, or ask any questions, i will definitely reply to your comments as soon as possible, or you guys can recommend me on which topic should i create my next post.

Thanks for your support.
February 19, 2020

Assembling a PC (Part-2) -Tech Master.

by , in

Assembling a PC (Part-2)

In last post i have discussed 4 main points about assembling a PC, 
They are as follows:-
  • Preparing the cabinet.
  • Installing the SMPS.
  • Installing the motherboard back plate.
  • Connecting a case fan to the cabinet.
If you guys have not read that article, just go check that out as i have discussed 4 main things listed above which will be very helpful for assembling a PC. Just click on the link given and you will be redirected to that page.

In this post, i will discuss next steps which will be even more helpful for assembling a PC.
The topics which we are going to discuss are:-
  • Installing the CPU or Processor.
  • Installing heat sink on Processor.
  • Installing RAM on Motherboard.
  • Placing motherboard inside the cabinet.

Installing the CPU or processor.

After completing the 4 steps from last post, Now it is time to install the CPU (Central Processing Unit) or the processor on the motherboard.
But wait, before installing the Processor take all the necessary precautions  to avoid static electricity problem.


What is static electricity?

For eg:- If you walk on a carpet and then grab a metal doorknob. You might get a quick shock. This is Static Electricity.

An anti-static wrist band is used to safely ground a person working on electronic equipment such as computers, to prevent build-up of static electricity in the body.
So, wear an anti-static wrist band when assembling or disassembling a PC.

Tip:-
Before starting with the installation, make sure that the motherboard and processor are compatible with each other.

Wanna know how to check the compatibility between the two?

Check the compatibility list on the website of the manufacturer showing motherboard types, the processors supported and the corresponding RAM and HDD supported.

To determine if the processor is supported, check the website of your motherboard manufacturer. Manufacturers maintain a CPU supported list. The CPU support list will specify which processor model numbers are supported.

Here are the tips to install the Processor on the motherboard.

The first step would be to place the motherboard on an anti-static flat surface.

Release the small metal lever holding the CPU retention bracket to CPU socket in the motherboard and remove the plastic cover placed on the socket pins.

Hold the processor from its corners, avoiding touching the contact points of the processor on the socket. 
Make sure that you align the guiding notches on the socket with the notches along the edges of your chip.
These notches are designed to prevent you from placing the CPU in the socket in an improper manner.

Once you have installed the processor in the socket, lower the retention bracket back into its place. Make sure that you slip the notch at the end of the bracket around the single screw at the base of the socket.

Next, use the metal lever to lock the CPU into its place.
Take care that you dont break the lever while lowering it down.

Installing Heat Sink on processor.

Once the processor has been installed, the next step would be to install the heat sink on the processor.

Tip:-
Check if the heat sink already has a thermal compound coating before starting with the installation steps.

Here are the installation steps.
Apply a small amount of thermal paste, enough to cover the metal surface of heat sink. Too much thermal paste can hinder performance and too less will not serve the purpose.

Hold the heat sink level parallel to the CPU surface to ensure that the thermal paste spreads evenly in all directions.
Secure it to the motherboard with the help of plastic push-pins.

Inspect the heat sink to confirm that it is sitting flush on the CPU.

Give the fasteners a gentle upward tug to be certain that they are locked into place.
Make sure that all fasteners are locked.

Installing RAM on the motherboard.

Once the heat sink has installed, the next step would be to install RAM on the motherboard.

Here are the tips to install the RAM.

Locate the memory slots on your desktop using the owners manual.

Align the notches on the module with the ridges in the memory slot.

Insert the RAM module using firm hands and even pressure and push down the module until the clips on the side of the slot snaps into its place.

Placing motherboard inside the cabinet.


Now that the CPU has been installed on the motherboard, let us place the motherboard inside the cabinet.

Place the motherboard into the case and screw it down by following these steps:-

Before placing the motherboard refer to the owners manual.

Check where the screw holes for the motherboard will go by aligning the motherboard holes with the case holes.

Lay the case flat on the desk and make sure that all the internal cables are out of the way.

Install the standoffs at the proper location matching with motherboard holes.

Gently slide the motherboard into the case, making sure that its rear ports are pushed up against the back plate correctly.

Screw the motherboard firmly into its place.

This is how you have to follow the steps to assemble a PC, I have explained in detail about everything and posted some images for better understanding which will definitely help you a lot. 

I am trying to explain each and every detail and solve every doubt occurring in your minds, so that understand all things properly and can assemble a PC on your own.

I am trying to give you value and trying to solve problems for who knows only basics and for those who doesnt. I am trying to write as simple as i can for better understanding.

If you guys like my effort, please share my posts and get subscribe to my blogs, so you can get e-mail notifications whenever i post new posts about technology.

In future i am going to tell more about technologies, troubleshooting issues and networking.

Please tell us in comment which thing should be improved even more to give you people more value.

Thank you for your support.
February 16, 2020

Assembling a PC - Tech Master.

by , in

Assembling a PC in simple steps.

Hey Guys, if you are looking for some tips on how to assemble a PC in few simple steps, then you have to follow this steps:-
I will break this down in steps, so that it will be easy for you to understand and it will be easy for you to understand and i hope i will be able to solve your problem.
PART 1
  • Preparing the cabinet.
  • Installing the SMPS.
  • Installing the mother board back plate.
  • Connecting a case fan to the cabinet.
Lets look at how to prepare the cabinet which consists of cabinet cases. Cases can come in different sizes. The most common computer case type is the tower model. The cases can be further classified into mini-size, mid-size and full-size tower cases. Depending on the specific number of internal drive bays and the height of the tower.

Although, mid tower cases are widely used.

In addition, there are Slim Line Cases Or Desktop Cases, which are simply tower cases turned, sideways. They can hold a monitor on top of the case.
 Different types of computer cases

Okay! Lets, get into our topic now.
So first lets discuss how to prepare a case or cabinet.

Zebronics rolls out- Rays - series cool cabinet is a tower cabinet.
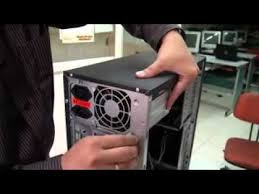
These types of cabinets are usually opened by removing 2 or 3 screws on each side of the back of the case.


Preparing the cabinet


To open the cabinet, perform these simple steps:

  • Remove the screws of the right hand side panel.
  • After removing, slide the panel back to release them from the chassis of the case.


  • Now, Once you have removed the chassis from the case the next step is to install the SMPS.
  • If some one doesn't know the full form of SMPS, so there you go it's (Switch Mode Power Supply).
  • So if you are at the very basic level then you may think how SMPS looks like, So here it is.

Switch Mode Power Supply

  1. Now the one question that might comes to your mind is what does SMPS do?

  • As the name itself tells that its Switch Mode Power Supply, So it basically provide powers to all components such as inductors and capacitors.
  • It converts AC voltage to low DC voltage.
  • These were some basics information you need to know as a beginner.
  • Now  before you install the SMPS , check that it is functioning properly.
  1. Now one might also think that how can i check the SMPS, before even installing in the chassis?

  • So the answer is as simple as that, you just have to short the Green (PS_ON) and Black (Ground) pins of 24 ATX power connector using metal wire.
  • Now once you have shorted this wire, just connect the one end of the power cable to the SMPS and another end to the wall socket, and just check if the fan rotates. if it rotates then your SMPS is ready to be installed. 
  • After checking the SMPS unplug the power supply.

  • Now locate the area of the SMPS, where it can be fixed.
  • In tower cabinets SMPS section will always be at the top rear area of the cabinet.
  • Slowly, place the SMPS at the proper location.
  • Hold the SMPS until you connect few screws and it becomes stable.
  • Align the screw holes of SMPS with the screw holes of the SMPS section of the cabinet and tighten the screws.
  • Now the SMPS has been installed successfully into the case.

Installing the mother board back plate

After installing the SMPS, the next step is to install the mother board back plate.
The mother board back plate is also called as blanking plate, which gives you access only to the ports that your mother board has. The back plate comes packed with the mother board.
Let us now see those steps which are required to the mother board plate.
Mother board Back plate.
  • Measure the back plate with the mother board. To do this, just hold the mother board until the cut outs matches the ports on the mother board.
  • Push the back plate against the mother board, so that any text written on it is readable.
  • Make notes of the ports that are covered.
  • Remove unnecessary bits to open the ports.
  • After finishing these steps, lets move on to next step.
  • From the inside of the case push the mother board plate into the gap at the rear of the cabinet.
  • Remember to align it so that it is the same way up as when you measured it against the mother board.
  • Now the last step of installing the mother board back plate, is to make sure that the ridge which is around the outside of the plate, clips it into the hole and check if it  remains stable without support.

Connecting a Case Fan 

  • After placing the SMPS inside the cabinet, the next step is to install the cabinet fan.
  • Most cabinets at-least comes with one fan which is pre-installed and some cabinets have two.
  • Typically, one fan is installed in front as an air intake and another at the back as an exhaust.
  • Since, some fans only blow air in one direction, Special attention is needed to check which way the fan is mounted in the cabinet.
  • To install the fan, go through these following steps:
  •  Orient the fan as per the marking made to indicate the direction of the air.
  • Align the fan with the mounting points.
  • Use screws to hold the fan in place.
  • And screw all the holes required for the fan to become stable in its place.
That is it, you just installed the Fan, SMPS and the back plate.
In my next posts i am about to post some more tips on installing other parts in easy steps which is fast too.

If you liked my post Please Share and Tell me in comments in which thing should i improve my posts to give you better service and help you give more information's on Other Technical stuffs as well.
February 12, 2020

What is the full form of computer parts? -Tech master

by , in

Full form of computer parts.

Have you ever wondered what are the full forms of computer parts written in shortcuts and have eagerness to know their full forms, If so, then you are at the right place, here are all the full forms I have learned through years of my research and learning in the field of technology. Hope this helps you and if you find the shortcut you were searching for, then please share my post and let other also know about this shortcuts.


Computer Full forms and Abbreviations.

  • CPU - central processing unit.

  • Ups - uninterruptible power supply.

  • CRT - Cathode ray tube.

  • LED - Light-emitting diode.

  • BIOS - Basic input output system.

  • LAN - Local area network.

  • WWW - World wide web.

  • IP - Internet protocol.

  • OS - Operating system.

  • RAM - Random access memory.

  • ROM - Read only memory.

  • CD - Compact disk.

  • DVD - Digital versatile disk.

  • VCD - Visual Compact disk.

  • FAT - File allocation table.

  • AGB - Accelerated graphics post.

  • PPP - Point to point protocol.

  • IPO - Input processing output.

  • VAT - Value added tax.

  • PF - Provident fund.

  • CST - Central service tax.

  • DRAM - Dynamic random access memory.

  • SDRAM - Static dynamic random access memory.

  • HTML - Hypertext markup language.

  • VB - Visual basic.

  • HDD - Hard disk drive.

  • FDD - Floppy disk drive.

  • CAN - Campus area network.

  • OLE - Object linking embedding.

  • MAN - Metro petition area network.
  • .
  • GOT - Get way of tally.

  • NOS - Network operating system.

  • HTTP - Higher text transfer protocol.

  • CAD - Computer-aided design.

  • DTP - desktop publishing.

  • OMR - Optical mark reader.

  • DOS - Disk operating system.

  • IT - Information technology.

  • IPMT - Interest per month term.

  • DBMS - Data base management system.

  • RDBMA - Relational data base management system.

  • ATM - Asynchronous transfer mode.

  • PROM - Programmable read only memory.

  • EPROM - Electrical programmable read only memory.

  • EEPROM - Electrical erasable programmable read-only memory.

  • NIC - Network interface card.

  • MD - Make directory.

  • DA - Dine allowances.

  • MA - Medical allowances.

  • TA - Travelling allowances.

  • HLL - High-level language.

  • MLL - Machine level language.

  • OMR - Optical mark reader.

  • FTP - File transfer protocol.

  • GOIC - Gateway user interface card.

  • GB - Gigabyte.

  • KB - Kilo byte.

  • MB - Megabyte.

  • TB - Terabyte.

  • HB - Hex a byte.

  • PB - Pent a byte.

  • VLSIC - Very large scale integrated circuit.

  • ULCIC - Ultra large scale integrated circuit.

  • XP - windows x- pert.

  • AU - Arithmetical unit.

  • USP - Universal serial pus.

  • SATA - Serial Advance technology attachment.

  • VGA - Video graphics area.

  • VDT - Visual display terminal.

  • VDU - Visual display unit.

  • ASSCII - American standard code for information interchange.

  • IT - Income tax.

  • DPI - Dot per inch.

  • DDE - Digital display element.

  • VLS - Very large scale.

  • PC - Personal computer.

  • If you like this post and want to learn more about technology please follow my posts and want to see my all posts, here is my link https://indiantechmaster7.blogspot.com/ please subscribe to my site so that you get mails whenever i post something new.
February 09, 2020

Safety Precautions | Computer Assembling Tips

by , in

Safety Precautions | Computer Assembling Tips

Safety Precautions | Computer Assembling Tips

If you are looking for safety precautions required for assembling and disassembling a PC then this is the right place to learn how to assemble a PC on your own and let others also know, and share with them how a PC can be assembled with some easy steps and precaution.

Safety Precautions | Computer Assembling Tips at home.

Soft lint-free cloth.

A soft lint-free cloth can be used for cleaning the monitor and other computer components.

Safety precaution tips

Fully shut down and unplug the PC before attempting to disassemble it.

Unplug and shut down before Disassembling a PC


Take out any Metal objects from your fingers and Arms, such as Bracelets,Rings,Watches etc.
Even if your unit is unplugged, there may still be some residual electric charges.

                                          
Make sure your Hands are completely DRY, to avoid damaging any mechanical parts as well as to avoid Electrocution.

An Anti-static wrist band is used to safely ground a person working on electronic equipment's such as Computers, PC, Television etc... to prevent build up of static electricity in the body.


Prepare a place to keep any screws, or other components that you remove from the PC.
A container or piece of paper with labels of each parts, is ideal to avoid  confusion between the similar looking screws.


 Handle all parts with care. Place each part or piece you remove carefully down onto a Stable Surface.


When removing any Cables, Wires, or Ribbons, Make sure to grasp the Wires at the base or head to avoid it from breaking.

Be careful not to drop any small parts such as screws into unreachable areas such as into the Computer fan or Disk drive.


A Note of three  most damaging things to a Computer:
Moisture, Shock And Dust.


IF YOU HAVE ENJOYED AND LEARNT SOMETHING FROM MY POST THEN YOU DEFINITELY SHARE IT ON SOCIAL MEDIA AND WITH YOUR FRIENDS. IF YOU WILL SHARE IT THEN IT WILL HELP OUR WEBSITE TO GROW AS WELL, AND HOPE SOMEONE LEARNS SOMETHING JUST BECAUSE OF YOUR SHARE. PLEASE DO SUPPORT.

THANK YOU.

February 06, 2020

Tools required for assembling and disassembling a PC.

by , in
Tools required for assembling and disassembling a PC- If you are looking for tools required for assembling or disassembling a PC then this is the right place to learn how to assemble a PC on your own and let others also know how to disassemble a PC at home, and share with them how a PC can be assembled with some easy steps


Tools required for assembling and disassembling a PC 2020.

  • Small Flashlight
  • Anti-Static Wrist Band
  • Needle-nosed pliers
  • Phillips-head Screwdriver
  • Cable ties
  • Pocket Knife

Small Flashlight

A small flashlight is used to light up areas of the CPU that cannot be seen well, as it quite dark inside and you will have to see the indicators printed on the motherboard.

Anti-Static Wrist Band

The Anti-Static Wrist Band is an elastic strap connected to a wire with a alligator clip on the other hand, which you should attach to the metal part of the computer chassis and the Anti-Static Wrist Band around your wrist, to avoid any static current to damage any component.

Needle-nosed pliers

Needle-nosed pliers are very easy for handling small items, removing and inserting jumpers on hard drives and motherboards.
You can also use TWEEZERS, if pliers are not available.

Phillips-head Screwdriver

The magnetic tip will prevent screws falling into the Case and will let you get access to the other parts of the case as well.

Cable ties

Plastic Cable Ties are useful for neatly bundling wires and cables away from fans and other components inside the computer.
If you cant find them, electrical tape is an acceptable substitute for plastic cable ties.

Pocket Knife

A Pocket Knife is used for cutting wires and stripping insulation.
This are the Tools required for assembling and disassembling a PC.
In my next Post i will post about Precautions while assembling and disassembling a PC
Later on, I will give detailed information about assembling and disassembling a PC.
To get some basic Knowledge about Components of a PC, click on the link given below.
To Buy the Tools required to assemble or disassemble a PC click on the headings given above each tools.


IF YOU HAVE ENJOYED AND LEARNT SOMETHING FROM MY POST THEN YOU DEFINITELY SHARE IT ON SOCIAL MEDIA AND WITH YOUR FRIENDS. IF YOU WILL SHARE IT THEN IT WILL HELP OUR WEBSITE TO GROW AS WELL, AND HOPE SOMEONE LEARNS SOMETHING JUST BECAUSE OF YOUR SHARE. PLEASE DO SUPPORT.

THANK YOU.


February 02, 2020

Components of a PC/Computer.

by , in

COMPONENTS OF   A PC


      INTRODUCTION


COMPONENTS REQUIRED TO ASSEMBLE A PC.
TOOLS REQUIRED.
SAFETY MEASURES DURING ASSEMBLY.